Interior Painting in Occupied Homes: How to Prepare
Learn how to prepare your home for interior painting while still living in the space.
PROCESS & QUALITY
1/20/20264 min read
Understanding the Challenges of Painting While Living at Home
Undertaking an interior painting project in an occupied home presents a unique set of challenges for homeowners.
One of the primary considerations is the necessity of careful planning ahead of time. Proper planning allows residents to determine which rooms will be painted first and how to allocate time efficiently for this task without overwhelming daily routines. It's essential to identify high-traffic areas that may require more immediate attention and to sequence the painting process to maintain livability.
Noise and mess are two significant factors that can impact daily life during this process. The clatter of paint brushes, the whirring of sanding machines, or the thud of furniture being moved can become disruptive. It is crucial to inform all household members about the schedule, as well as to set expectations for the anticipated noise levels. By choosing low-noise painting methods, if possible, homeowners can reduce the disruption to day-to-day activities.
Additionally, creating a plan about how to navigate the living space during the painting process is essential. Homeowners should assess which rooms can be safely occupied while painting occurs in others.
It may be wise to designate certain areas as temporary living spaces, such as moving to seldom-used rooms or even relocating to another part of the home when necessary. Thoughtful consideration of furniture and items in the areas being painted is also required. Protecting these belongings with drop cloths or moving them to another room can minimize the risk of splatters and damage. Lastly, recognizing how long painting activities will take and factoring in drying times is key to reducing the stress often associated with this change.
Overall, understanding the challenges and taking proactive steps can facilitate a smoother painting experience.
Essential Interior Painting Preparation Steps
Preparing for interior painting in occupied homes requires a careful approach to minimize disruption while ensuring a quality finish. One of the first steps is to thoroughly clean the surfaces that will be painted. Dust, grease, and grime can adhere to walls and ceilings, leading to poor paint adhesion. A simple wash with soap and water or a mild detergent can often suffice, followed by rinsing and allowing the surfaces to dry completely.
Next, it is essential to protect furniture and flooring to prevent damage from paint splatters. Homeowners should move furniture away from the walls and cover large items with plastic or drop cloths. For floors, adhesive-backed plastic or canvas drop cloths can prevent paint spills from causing stains.
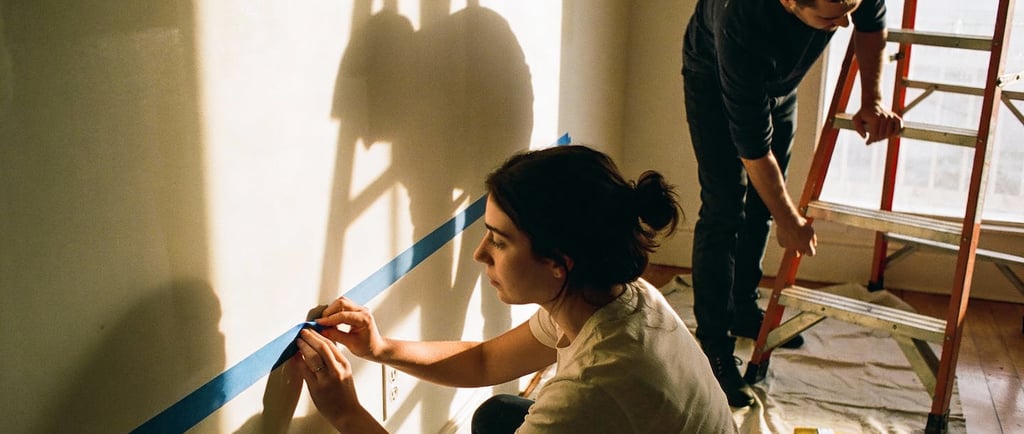
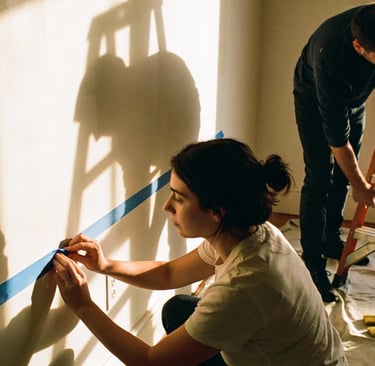
Additionally, tape should be used to mask edges around windows, doors, and trim, ensuring crisp lines when the painting process is complete.
Selecting the right materials and equipment is crucial. Homeowners should invest in quality paint brushes and rollers, as well as trays for easy access to paint. It is advisable to choose paint that is suitable for the specific interior surfaces, considering factors like sheen and washability. When it comes to paint type, consider water-based options, which are less odorous and dry faster, minimizing inconvenience in occupied spaces.
Furthermore, it is beneficial to create a painting schedule that considers residents' routines.
Painting during off-peak hours, such as weekends or evenings, can reduce stress for those living in the home. By taking these essential preparation steps, homeowners can ensure a smoother interior painting experience that is efficient and less intrusive.
Home Painting Tips for a Successful Project
Embarking on an interior painting project while inhabiting your home can present unique challenges, but with careful planning and the right approach, homeowners can achieve a refined finish.
One of the first steps towards success is to select paint colors that will not only enhance your space but also evoke the right mood. Consider incorporating samples into your decision-making process by applying test patches on the walls to observe how colors change in different lighting conditions throughout the day.
Moreover, the choice of paint type is crucial. Opt for low-VOC or zero-VOC paints, which are designed to reduce harmful emissions while still providing a high-quality finish. These environmentally friendly options are particularly advantageous in occupied homes, as they minimize odors and air quality issues during and after the painting process. For the areas that require more durability, such as kitchens or bathrooms, consider paint finishes that are washable and resistant to moisture.
Timing can significantly impact how smoothly a painting project unfolds.
By planning your project during quieter times, such as weekends or holidays, you can manage disruptions better. Additionally, keep in mind the local climate; painting during dry seasons can lead to faster drying times. Ventilation is another key aspect of a successful interior painting project. Ensure the area is well-ventilated by opening windows and using fans to help circulate air, which promotes drying and helps to disperse potentially harmful fumes.
Lastly, never underestimate the importance of safety measures. Use drop cloths to protect your furnishings and flooring and wear proper protective gear, including gloves and masks, especially when using solvent-based paints. These precautions can help ensure that your home painting project proceeds without unnecessary risks or damage.
Post-Painting Clean-Up and Maintenance
Once the painting process is complete, it is essential to address the clean-up of both tools and surfaces to ensure a tidy home and maintain the quality of your new paint job.
Start by collecting and properly storing or disposing of painting supplies. Brushes, rollers, and trays should be cleaned immediately to prevent paint from hardening. For water-based paints, rinse tools thoroughly with warm water and soap, ensuring all paint is removed. For oil-based paints, solvents such as mineral spirits or paint thinner will be required. Always follow the manufacturer’s guidelines for cleaning supplies to avoid damage.
After the tools are cleaned, the next step involves addressing any paint spills or splatters on surfaces. For hard surfaces, a damp cloth can often do the trick, or a gentle cleaner may be necessary for tougher spots. Ensure that any leftover paint on furniture or floors is removed promptly to avoid permanent stains. When cleaning walls, use a sponge with mild soap and water, testing on an inconspicuous area first to avoid damaging the finish.
Disposing of paint products also requires careful consideration. Unused or leftover paint should be taken to a hazardous waste facility, as it can be harmful to the environment. Many municipalities have recycling programs for paint, which can be a responsible option for disposal. It is also important to check local regulations regarding paint disposal, as requirements can vary significantly.
To maintain the freshness and longevity of the newly painted surfaces, regular care is necessary. Dust and dirt can accumulate, potentially leading to discoloration. Use a soft cloth or duster for routine cleaning. If you notice any chips or dings, address these issues promptly with touch-up paint.
This diligence will help preserve the beauty and integrity of your painted interior over time.
ConforX
Personalized interior painting and thermal imaging services in Valencia, Spain
Phone / WhatsApp
Interior Painting
Wall Surface Preparation & Minor Repairs
Thermal Imaging Inspections
© 2026. ConfortX . All rights reserved.
SERVICES
info@conforx.es
+34 692525330
QUICK LINKS
LEGAL